
In my previous post I talked about replacing my Canon ink jet printer with a new Brother laser printer. This new printer has two emulation modes that peaked my interest: Epson FX emulation and IBM ProPrinter emulation. Having used Atari 8 bit and 16 bit (ST) computers in the 1980’s with a large amount of my printing done on Epson compatible printers, I decided the Epson FX emulation in the Brother HL-L5200DW needed a deep dive. The goal was simple – get a printout generated by an Atari computer to print on the laser printer, not a PDF, a physical copy, complete with all the jagged-ness that accompanies a dot matrix printer.
To do this I used the following:
- Mac computer running OS X 10.11
- Brother HL-L5200DW laser printer
- Atari800MacX Atari 8 bit emulator
- Hatari Atari ST emulator
Setup
Base Printer Setup
- I installed the Brother drivers on the Mac. The Brother laser is set to use a wireless ethernet connection. The Brother driver software installs just the drivers, nothing more, and completed in about 15 seconds. Bravo! Once setup I made sure the Mac could print to it by printing a test page:

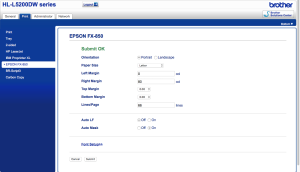
- I then ensured the Epson FX emulation was setup correctly. I had to change a few settings to get the printouts looking correct. Of note, the top and bottom margins were changed from 0.33 to 0.00, which also changes the page line count from 62 to the familiar 66. The other important change is altering the Auto Mask setting from Off to On. Here is the Brothers Epson FX configuration page:


CUPS Setup
Next the CUPS printing system needs a new printer definition. This new definition will be set as a raw device, and will be configured to use LPD. You may have luck using one of the IPP configurations as well, but the LPD method works reliably.
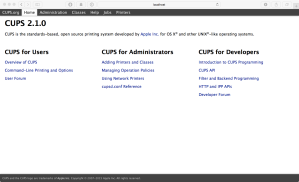
- First connect to the Mac’s CUPS web interface (http://localhost:631). If it is not enabled, you will need to enable it by issuing the command “cupsctl WebInterface=yes” as root (or using sudo) from the Terminal. From the main CUPS page, select “Adding Printers and Classes” in the “CUPS for Administrators” section (may be slightly different based on your version of CUPS):
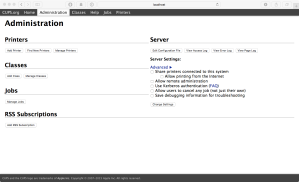
- On the Printers and Classes page, select “Add Printer” from the “Printers” section:
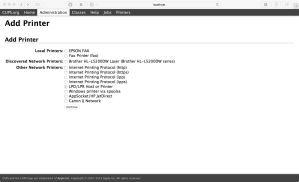
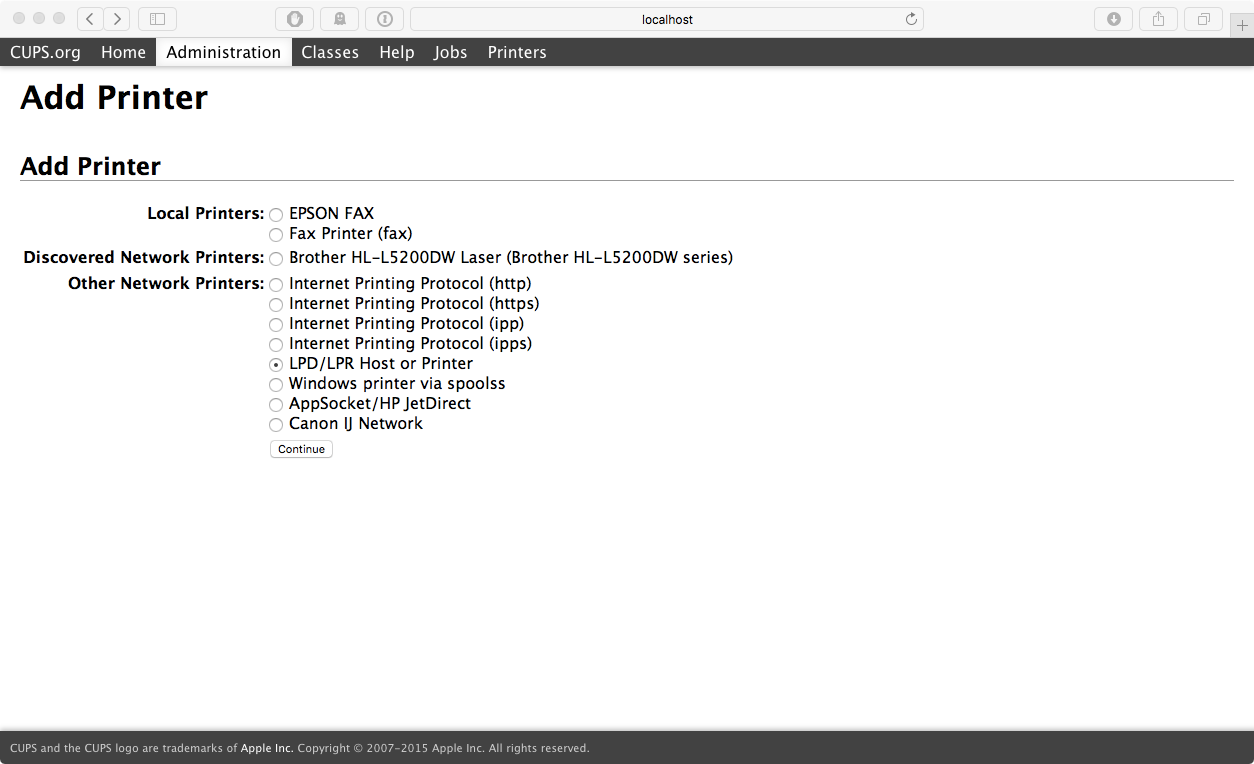
- On the Add Printer page, select “LPD/LPR Host or Printer”:
- On the Add Printer Connections page, enter the URI as “lpd://ip_address_of_printer/queue”. Watch out for auto-correct trying to change lpd to led. In this example I have used 192.168.1.1 which is not my actual lasers address or my network for that matter:

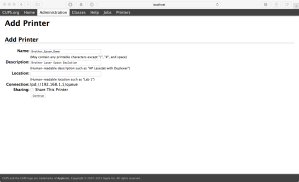
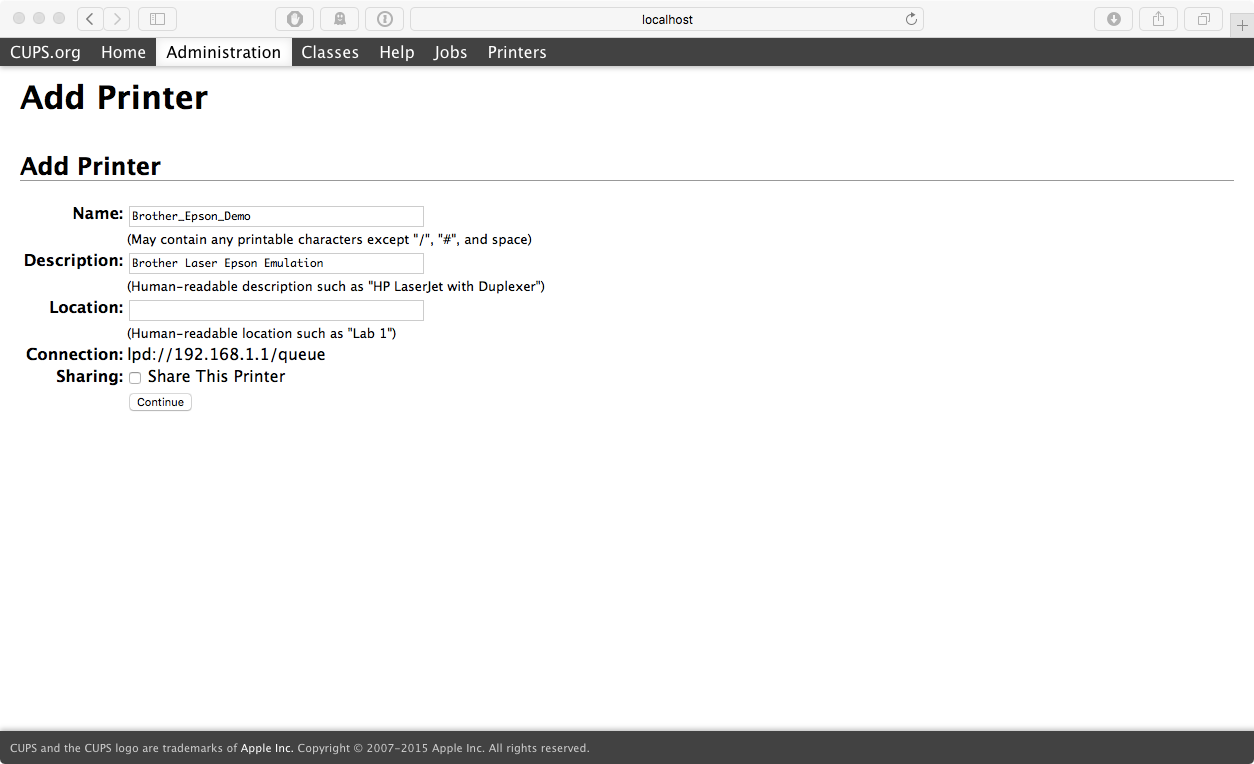
- On the Add Printer Name/Description page, enter a name that makes sense such as “Brother_Laser_Epson”. This is how you will reference the printer from the CLI later. Note you can not have spaces! Save those for the description where you can enter whatever you like. In this example I used “Brother Laser Epson Emulation”:
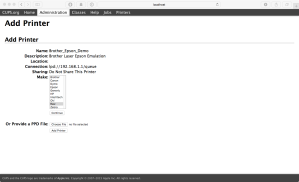
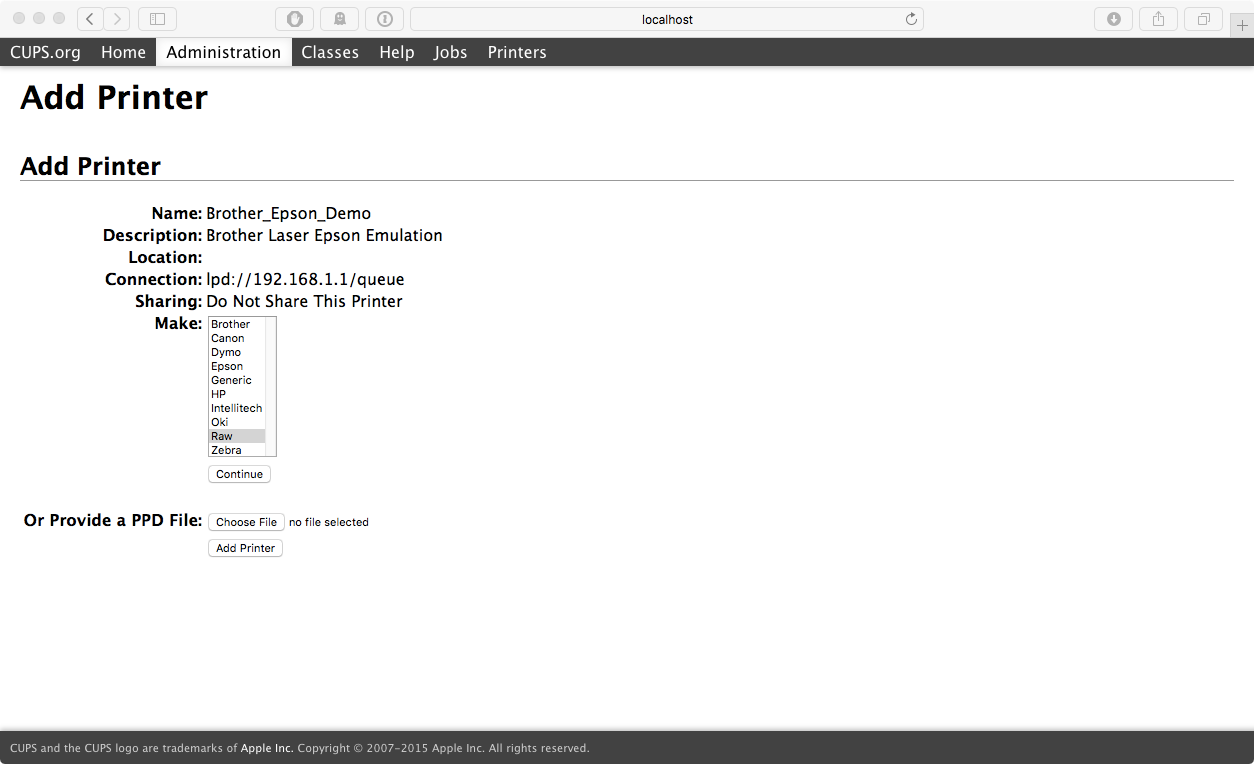
- On the Add Printer Make page, use the list selector next to Make to pick “Raw”:
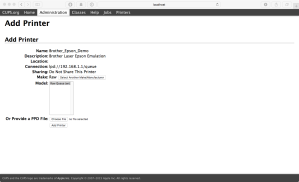
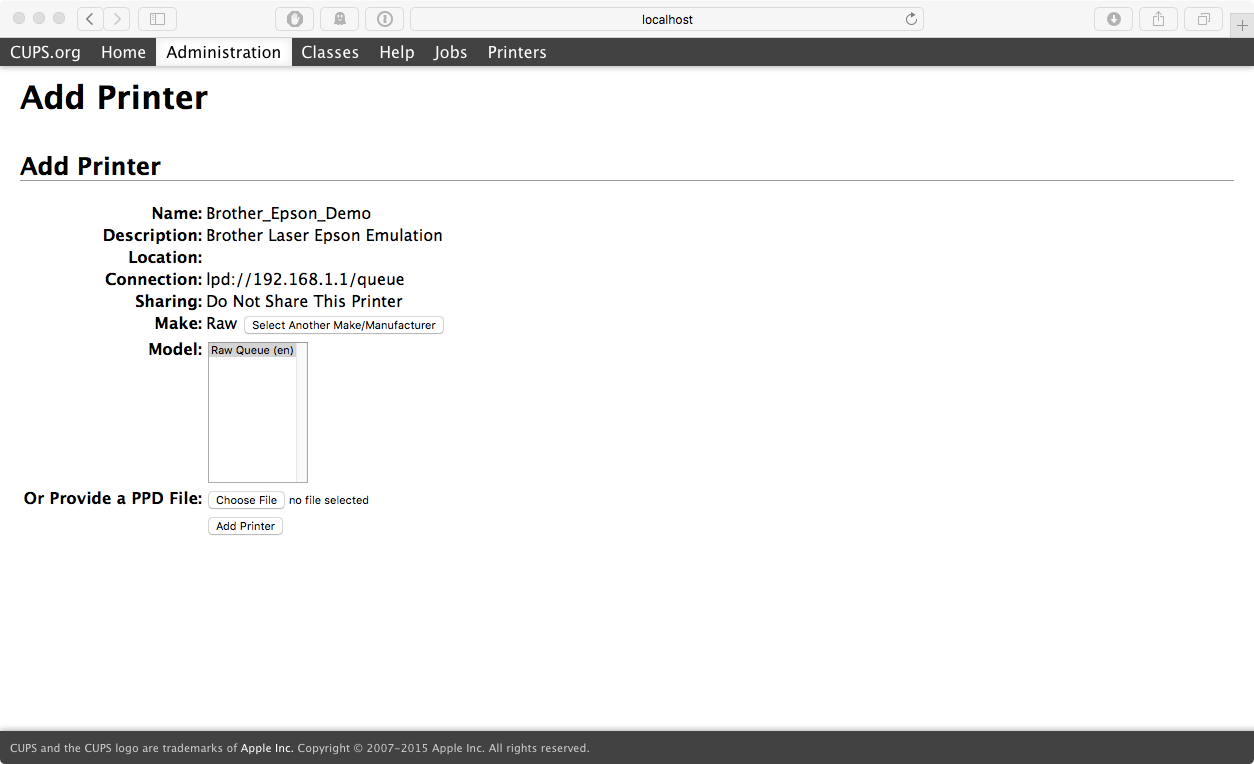
- On the Add Printer Model page, use the list selector next to Model to pick “Raw Queue (en)”, then click “Add Printer”:
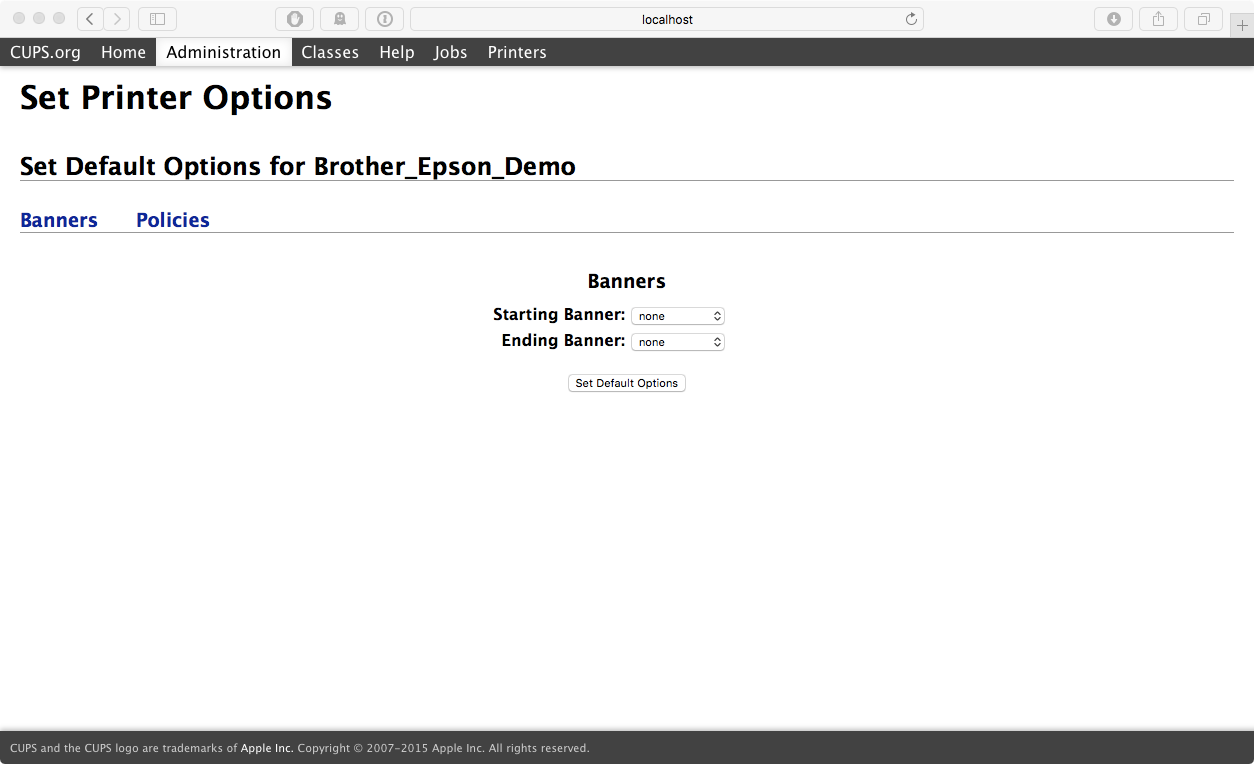
- On the Set Printer Options page, ensure that starting and ending banners are set to none (default), and click “Set Default Options”:

- You will get confirmation page that will redirect a few seconds later to a status page for the newly defined printer. The newly defined printer will not show up in OS X printer preferences, but rest assured it is available. If you messed up, you can delete the printer from the “Administration” drop down located on this page. For the definition example I used the name “Brother_Epson_Demo”, but in later output you will see my real name as “Brother_Epson”:
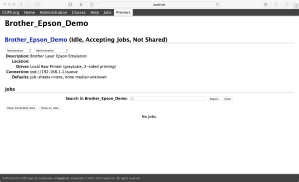
- Select the Printers menu/tab option from the CUPS header. This will show you all defined printers. If all went well you will see the Brother printer defined initially to OS X, and the newly defined “Local Raw Printer”:


Printing
For my purposes I used Atari emulators running on OS X. The emulators provide a way to capture printer port data to a file, thereby allowing the Atari computer software to use their own “printer drivers”. This results in a binary data file containing all the data that would have been sent to the printer, in other words, a raw printer file.
If you have ethernet connectivity from the Atari, you may even be able to print directly to the networked printer. The ST should be easier to do than the 8 bit. I will figure this out once I get an Atari (8 or 16 bit) connected via ethernet. It is unlikely I will ever get an 8 bit connected via ethernet, though it would be cool trick.
Atari 8 bit
For the Atari 8 bit using Atari800MacX, I could have just printed to an emulated Epson FX printer and saved the output directly to PDF, then printed the PDF. But what fun is that? I want the printer to raster the page from the Epson FX commands, not a software engine.
If the program you want to print from can print directly to a file, such as many word processors, do that. But don’t do it as plain ASCII, do it using the printer codes/driver. Once you have the output file on either an ATR (simulated floppy disk) or simulated hard drive, copy/extract the output file to the Mac’s local filesystem. Now skip ahead to “Dump Output File” below.
If the program you want to print from can not print directly to a file, then the Atari emulator needs to be setup to capture the printer output to a file on the host computers local filesystem. For Atari800MacX, set the printer to Text. The output file will contain all the binary data even though its a “text” file. The printer type should be called “File” not “Text”.
Atari ST (16/32 bit)
For the Atari ST, simply configure the emulator to send all printer data to a file. Then configure each program you want to print from to use Epson FX printer codes/driver. After each print, simply collect the file. When using Hatari, the default printer output filename will be “hatari.prn”. With the file collected skip ahead to “Dump Output File” below.
Dump Output File
Now you should have a printer output file ready to be sent to the printer. If not, go and create one, then come back here.
- Open Terminal and change directory to wherever your printer output file is.
- Enter the command “lpstat -p -d”. This will show you the defined printers, their status, and the default destination printer. You are primarily interested in the “Brother_Epson” (or whatever you called it) entry. Just make sure it’s idle and enabled:
MacBook:~ user$ lpstat -p -d
printer Brother_Epson is idle. enabled since Sun Jun 19 16:37:12 2016
printer Brother_HL_L5200DW_Laser is idle. enabled since Sun Jun 19 10:14:31 2016
system default destination: Brother_HL_L5200DW_Laser
- Use the “lp” command to send the printer output file to the printer. Make sure you specify the destination printer (-d), the raw option (-o), and the filename:
MacBook:~ user$ lp -d Brother_Epson -o raw 1632_CRLF.prn
request id is Brother_Epson-29 (1 file(s))
- Wait a few seconds and the Brother laser should spit the page out in all of it’s simulated dot matrix glory. Now instead of worrying about worn ink spots in the printer ribbon you can worry about low toner and bad drums.
Results
I created a sign using PrintMaster on the Atari ST. I configured Hatari to output to a file. I then printed that file using the method above. A scanned image of the laser printers output is here:
https://unfinishedbitness.files.wordpress.com/2016/06/brother1632_16bitscan.pdf
To contrast that with printing to a simulated Epson FX printer, I took that Hatari generated output file and copied it to a simulated disk on Atari800MacX. I then copied the file byte for byte to the emulated Atari 8 bit printer port set as an emulated Epson FX-80 printer. The simulated printer output was saved as PDF and can be seen here:
https://unfinishedbitness.files.wordpress.com/2016/06/brother1632_8bitdump.pdf
